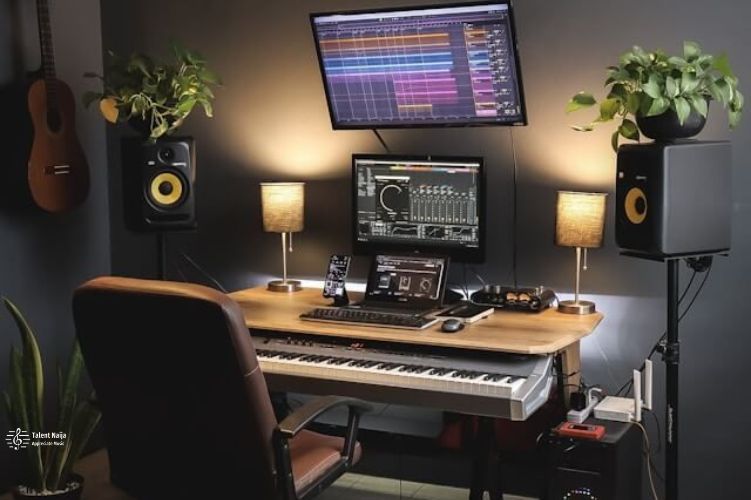
As a singer who has been recording and producing her own music for seven years, I know how to make a cheap home studio that works. When I first started, I thought I needed expensive gear worth thousands of dollars to make records that sounded like they were made by professionals. I’ve learned, though, that you can make a good studio for a lot less money by trying different things. Read below about “How to Build a Home Music Studio on a Budget?”.
I’ll talk about everything I know about making a cheap home studio in this piece. Based on my real-life testing, I’ll tell you which products to buy and how to get great sound without spending a lot of money.
Table of Contents
How to Build a Home Music Studio on a Budget?
You’ll find useful information on how to turn your extra room into a place to make music, no matter how experienced you are as an artist.
Determine Your Needs
The first thing you need to do is write down your studio wants and goals. Think about these questions:
- How do you record? What do you need? Are you going to record singing, guitars, and keyboards?
- What kinds of music do you make? Rock music has very different needs than classical music.
- Would you rather record real instruments or use computer-based instruments and loops?
- How many tracks do you need at the same time? It costs more when there are more mics and sources.
I make electronic pop music, so all I need is a vocal mic, MIDI keyboards, and an audio interface with enough sources to record everything. Knowing your goals ahead of time will help you avoid buying things that you don’t need.
Shop Used Gear
It is a great way to save money to buy used things. Music stuff is usually very valuable, so you can get good items that are still in great shape for half the price of new. It would have cost $200 to buy a new Avantone Pro microphone, but I got one used for $100.
For deals in your area, check out Craigslist, Facebook Marketplace, and Reverb. If you buy something on eBay or another website, make sure you read the seller’s reviews and return policies carefully in case the item comes broken. There are risks when you buy used gear, but you could save a lot of money.
Choose an Audio Interface
An audio interface is the most important part of any studio because it lets you send and receive both analog and digital data. This lets you record microphones, instruments, and MIDI gear into your program for recording.
Focusrite makes great devices for low prices, like the $120 Scarlett Solo. It has one XLR input for microphones, an instrument line input, MIDI connectivity, and good preamps built right in to boost sounds. If you pay $150 more, you can get an extra input with the 2i2 model.
These Scarlett interfaces offer excellent sound and features at a price that is easy on the wallet. I’ve had a few different types over the years, but the 6i6 I have now works great.
Select Studio Monitors
For mixing and mastering, studio monitors are essential because they let you hear your tracks clearly. Headphones can be used in a pinch, but speakers sound better overall.
The PreSonus Eris E3.5 monitors are great, and they cost about $100 a pair. With a smooth sound, they sound great for how cheap they are. Along with Sonarworks tuning software, I use these to level out my small bedroom “studio.”
Late in the game, you don’t need the biggest or most expensive TVs. Pay attention to getting good, clear sound. You can always improve as your skills get better.
Take Care of Your Room
Noise gets messed up when it hits hard objects like walls and ceilings and bounces back. Using absorption and diffusion screens to treat your room will help with this problem.
It’s easy and cheap to treat noise problems yourself. For $50, you can get a 12-pack of Owens Corning insulation batts. Staple them inside wood frames that have been wrapped in fabric. Put these plates around your mix position in places where people will see them.
I also used scrap plywood to make a slanted wood diffuser to spread sound waves around. When put together with corner bass traps, these cheap panels I made quieted down my room.
There are more advanced options, like Auralex foam blocks, but fiberglass and wood that are rigid work very well. Just make sure that when you cut things, you wear the right safety gear.
Choose a DAW
For recording, editing, and mixing sound, the DAW (digital audio workstation) is where all the software comes together. Professional DAWs can be hard to use, but there are also a lot of good choices for people who are just starting out.
Bandlab’s Cakewalk is free and full of useful tools. I used Cakewalk for many years before I moved up. The free program Audacity is also very useful. Before you pay $60 for a personal license, Reaper gives you a nice free sample.
If you’re just starting out, I suggest these free or cheap DAWs. Before you buy more expensive tools, learn the basics. After outgrowing my early tools, I now use Ableton Live Suite.
Consider Plugins
Plugins are extra pieces of software that make your DAW better. Virtual instruments are often used with effects like EQ and compression. I use synth and drum tools a lot as an electronic artist.
Professional apps can be pricey, but there are a lot of free and cheap alternatives:
- Komplete Start by Native Instruments is a free sample package.
- The TAL Noisemaker synth costs $30.
- Audio Damage Basic is a $49 sound pack that
- ValhallaDSP add-ons cost $50 each.
Plugins, even cheap ones, can wait until you’re ready. Learn to make music first using only the sounds and instruments that come with the DAW. Then, in the future, add some paid add-ons of your choice.
Think Long Term Upgrades
It takes months or even years to build a home studio. I’m always making my hardware and apps better. Think of the things you start with as a base that you can build on.
You might listen to music with headphones first before getting speakers. The Scarlett Solo might meet your needs right now, but you’ll need more I/O in the future. With used gear, you can wait to upgrade.
Make a list of upgrades you’d like and set aside money every year for new tools. Instead of big, expensive overhauls, you should make small purchases over time to keep your studio moving forward. Waiting pays off here.
The Pleasure of Making Music
Even though good recording gear is important, don’t let lack of money or other obstacles stop you from making art. Any tools you have on hand can be used to make music.
At first, I used an SM57 microphone plugged into my computer’s soundcard to record whole songs. It wasn’t as good as my treated room and Focusrite interface today, but I was still making music!
It takes a long time to build the right studio. Start making things right now, wherever you are. Have fun, and enjoy every small step forward that helps your creative ideas come to life. I hope you like reading “How to Build a Home Music Studio on a Budget?”.

With a Master’s degree in Musicology and over 4+ years of experience in promoting musical talent, our author brings a blend of academic expertise and real-world insights to TalentNaija. Passionate about showcasing diverse musical genres, emerging artists, and industry trends, they provide practical tips and authentic experiences for music enthusiasts. Connect on Instagram @talentnaija_official and Facebook Talent Naija for the latest updates and inspiration.
Connect with Us:
Instagram: @talentnaija_official
Facebook: Talent Naija

